 Wikipedia isn’t the only Wiki around. A wiki is a generic term us geeks use to describe “A website that allows collaborative editing of its content and structure by its users”
Now wasn’t that a mouthful.
To put it simply, a wiki is a website that contains many articles, and ANYONE can update those articles.
Why do you need a site wiki, well the website gigaom has 15 different uses for a wiki. You can use it for anything from project management to knowledge retention. So having one certainly does score you points with the ladies,…well not really but you get the picture.
More to the point, wikis are a cool tool to have on any website. Installing wikis are simple and straightforward too, if you’ve installed your own wordpress, there’s no reason to think you can’t install your own wiki.
For this example, I’m going to install mediawiki in my nearlyfreespeech website. Mediawiki is the platform that powers wikipedia (so you know they’re good), but if you’re interested in experimenting, try wikkawiki or a few other free wiki platforms available for download. As usual wikipedia is the first place you should go to search, check out this entry for more info.
So here’s how you install it:
Step 1: Create a Subdomain
Create a subdomain for your website, it doesn’t have to be titled ‘wiki’, but make the name clear it’s probably a good sub-domain name. Subdomains help make the site more logically divided. The also let you delete the whole wiki without affecting the site. For more info on setting up subdomains on nearlyfreespeech you can read my earlier post here.
For this example, I’m going to be using my domain (www.keithrozario.com), and I’ll create subdomain (wiki.keithrozario.com).
Step 2: Download Mediawiki
Sub-domains take time to setup, so while that’s being setup, head on over to www.mediawiki.org to download the latest media wiki. Be sure to download the zip file (it’s easier to install).
Step 3: Copy the mediawiki folder into your main folder via sFTP
Step 4: Unzip the folder using SSH
You’ll need to unzip the package, most of us with windows would need to download 7-Zip to unzip this on your PC, and that would be a pain and a chore. A simpler version would be login to your SSH and run the following command
 tar -zxvf *
By then your FTP will look like this:
Before moving to step 7, you’ll need to setup your permissions correctly. Login to your SSH again and run the following command from the main prompt:
chmod 777 wiki/config
*This command sets the config subfolder to all writable, something that needs to be done for the installation to proceed. We’ll reset it back to safer permission once we’re done with the install. Another way is to use WinSCP and set the permission by right-clicking the file and modifying permissionsStep 5: Tidy stuff up (optional)
To make things easier I’ve renamed the mediawiki1.16-5 to simply ‘wiki’ and deleted the zip file for tidiness. So in the end what I get is:
 *to save yourself a full bunch of trouble, unpack the ‘/wiki’ folder out into the root directory, this will save you on step 11
Step 6: Create a Database
From your nearlyfreespeech menu, look for the MYSQL options, (it’s right next to support), then select your db process (create one if you haven’t already). The select ‘Create new Database’ from the side menu.
Then use a wiki name, I use wikidb and provide a username and password. (Write down the database name and username/password).
Then click create now.
Step 7 : Logon to the your wiki page and set it up.
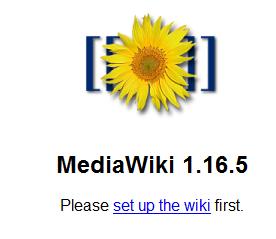
Browse to http://wiki.keithrozario.com/wiki and you’ll see something like this:\

Step 8 : Enter the related info
Most of this is easy, except the DB related stuff. For DB related stuff, use the following:
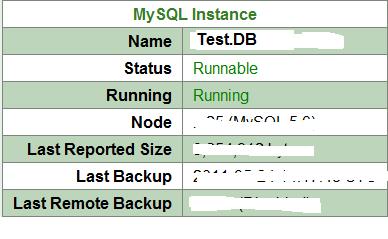
Firstly go to the mysql option of your nearlyfreespeech control panel. Then look for the name of your mysql instance, an example here:

Then enter the information into the database information part of the page:
Database host: localhost
Database name: -as from step 6-
Database username : -as from step 6-
Database password: -as from step 6-
Superuser account: (leave unchecked)
Step 9: Copy the localsettings.php file from the ‘/wiki/config’ folder to the ‘/wiki’ folder.
You’ll need to move the Localsettings.php file found in the ‘/wiki/config’ folder out to the ‘/wiki’ folder.
Step 10: Tidy up permissions
Perform the following commands on the SSH:
chmod 775 wiki/config
chmod 777 wiki/LocalSettings.php
Step 11: Redirect traffic from wiki.keithrozario.com to wiki.keithrozario.com/wiki
This was an oversight on my part, but only after installing did I noticed we’d be stuck with a wiki that links all it’s articles with wiki.keithrozario.com/wiki/ArticleName
RewriteEngine on
RewriteCond %{HTTP_HOST} ^keithrozario\.com$
RewriteRule (.*) http://www.keithrozario.com/$1 [R=301,L]
RewriteRule ^$ wiki [L]
Replace keithrozario.com to the name of your domain.
You’re Done.
Now this post was written for nearlyfreespeech users, who are generally more savvy than your usual web user, but if you’re uninitiated to even try this. Dreamhost has a 1-click install that will settle all your problems from step 1-6.
So basically Dreamhost reduces your MediaWiki installation from a 11 (or 10) step process to just 3 steps. Steps 8,9 and 10. That’s the difference between Dreamhost and Nearlyfreespeech.


I’m confused about step 11…
“This was an oversight on my part, but only after installing did I noticed we’d be stuck with a wiki that links all it’s articles with wiki.keithrozario.com/wiki/ArticleName
RewriteEngine on
RewriteCond %{HTTP_HOST} ^keithrozario.com$
RewriteRule (.*) http://www.keithrozario.com/$1 [R=301,L]
RewriteRule ^$ wiki [L]”
Where are you entering in that text? Into which file? And via ssh? ftp?
Hi Jordan,
Sorry, that should be entered into your .htaccess file.
Keith