 A couple of days ago, I met some guys from Amazon web services strutting their stuff out in a brilliant presentation about cloud computing. Now I must admit I haven’t been the most ardent cloud computing follower (I wasn’t really sure what it meant) , but I was ‘converted’ by these guys….to the point where I wanted to dive in and learn about the cloud.
And in keeping with my belief that the best way to learn is to do, I decided to host a website on Amazon Web Services and see if it really could be setup in minutes (as promised by Amazon). Amazon also promised year long free trial of their EC2 platform, basically you get a very small virtual machine hosted on Amazon for free (for a whole year), which was too damn ridiculous to turn down. So if Amazon was spot on their promises you could setup a wordpress site on Amazon in minutes AND it would cost you nothing for the first year…now that IS interesting.
So I logged on to amazon web services at (aws.amazon.com) and registered myself, registration was a bit complicated, for some reason amazon needed my phone number and gave me a pin code via my phone, but other than that it was pretty straightforward. However, after the registration Amazon needed to validate my subscription….and that took time. About 6 hours to be precise, what Amazon did in the 6 hours was beyond me, but eventually the relented and gave me my account.
Launch EC2 Instance
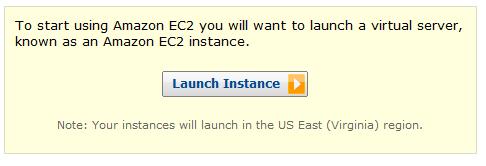
However, once I got the registration process validated and complete, I was finally ready to get down to the business of publishing my site. So I began, the first step I did was to launch an instance, and you do that by clicking on the launch instanc button of the EC2 tab, which should appear exactly as below:
Choose an Image
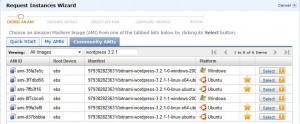 The Next step is to choose an image, and for a wordpress site I chose one of the bitnami images. Now you can choose almost any image you wish for, but I went for the 979382823631/bitnami-wordpress-3.2.1-0-linux-ubuntu-10.04. If for any reason you feel like you need an older version of wordpress or a different version of Linux, then feel free to go for it. However, the rest of this tutorial/testimonial will deal specifically with this image only, so some steps may vary, but overall it’s pretty standard.
Select Instance details
Once I picked out an image,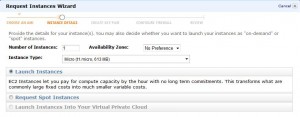 Amazon needs to know what kind of machine you want to run this on. Now you can run it on just about any machine you want, but only the Micro (t1.micro, 613MB) machine is free for year….so if you don’t know which one to pick, pick this one…remember Amazon has your Credit Card and it will charge you if you pick the wrong machine, and if you do and get charged, well it’s your fault now isn’t it?
Specify Instance details
N ext you need to specify the instance details, so far so good. In this case all you really need to do is press next.
Specify Key Tags…once again not much!
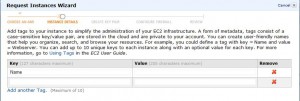 Here you can specify tag for your keys, these keys will be tied to an instance for you to access the image later on. For now you can leave it blank, and I would strongly recommend you leave it this way.
Create a Key Pair
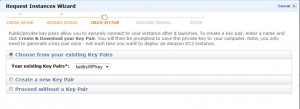 A key pair is quite possibly your only way to securely access your instance, so be careful here. Here I created a key pair called keithsWPkey, and it’s pretty simple to execute. Just create a key pair and amazon will create it and immediately you’ll begin downloading a .pem file, now this is you local file. Amazon has another .pem file stored on it’s servers. When you logon you will use your .pem file and amazon will validate that against it’s own, if the .pem files match, you’re good to go. If not you’ll be denied access. So remember to store the .pem file safely and securely.
Create a Security Group
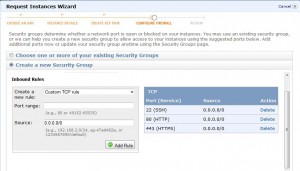 Creating a security group helps control who can access your image and how. Amazons default security profile blocks all traffic, so it’s not really that useful. You’ll need to create your own security profile, for wordpress you’ll at least need the following ports open, 22 (for sFTP and SSH), 80 (for http access to your blog) and 443 (for https access).
To add these select the ‘Create a new security Group’ button. Then Create New Rule, select ‘Custom TCP rule’. Next for port range enter 22, and then select 0.0.0.0/0 for your source (that’s zeros). The zeros mean all can access port 22. Then simply repeat the steps for port 80 and 443. The end result should look exactly like the picture here (click on the picture to enlarge).
Launch the instance
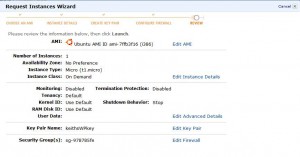 Now click on next, and just before you launch you may want to check on the following items:
1) Is the instance type t1.micro? If not, am I sure this is what I want?
2) Do I have a .pem file with the same name as the key pair name?
3) Is the security group settings as expected?
If it’s all good, hit the launch and enjoy
Get an Elastic IP
 Now that you’ve got the instance running, it will have a url, signified by Publich DNS field in your instance details. Now you need an IP address for it, so head on over to the Elastic IP part of your AWS management console (it’s in your EC2, to the left, under Network and Security) and get your IP by hitting the ‘Allocate New Address’ button.
Associate your instance to it
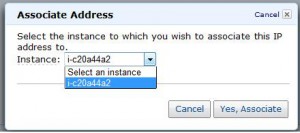 Now that you have an IP, it’ll be simple to associate an instance to it. If you are brand new to AWS, then you should only have one instance running and that’s the one you want to associate with your brand new elastic IP. After you’ve completed this step it’s pretty simple, the IP address given is now associated to your EC2 (which should be running wordpress). So head on over to the IP address and you’ll see a bitnami page.
Alternatively, if you look at the properties of your EC2 instance, you can find a field called , public DNS, and should have something like ec2-XXX-XX-XXX-XX.compute-1.amazonaws.com, in this case I can also access the wordpress by pasting the link on my browser.
Check the instance
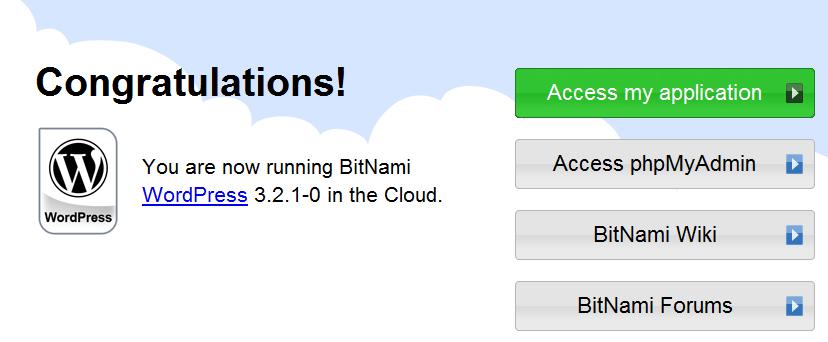
Now when you logon to the page at ec2-XXX-XX-XXX-XX.compute-1.amazonaws.com you’ll see something like this:
If you’ve reached this far, things are looking really good.You can also try going directly to the ip such as http://XXX.XX.XXX.XX and that should give you the same result above.
Setup WordPress
Now it’s time to setup wordpress, for the bitnami image I chose, wordpress is installed in the wordpress folder. Meaning to access wordpress you need to the ‘/wordpress’ directory of your site, which in this case is ec2-XXX-XX-XXX-XX.compute-1.amazonaws.com/wordpress . To setup wordpress however (and if you have a wordpress blog you should know this) go to the ‘/wordpress/wp-login.php’ link. So go to the ec2-XXX-XX-XXX-XX.compute-1.amazonaws.com/wordpress/wp-login.php.
And you’ll see the generic wordpress login screen.
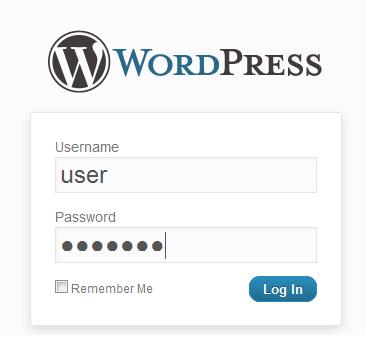 Now for the particular AMI I chose, the username and password for the image are :
Username: user
Password: bitnami
The username and password are all lower case. If you chose another image it isn’t the end of the world, as the image provider usually specifies this somewhere you can google it.
Once you’ve logged in, you’ll need to change the username and password. I suggest creating a new wordpress user and giving that user admin rights, before deleting this user, but that’s up to you.
Now that wordpress is up and running, you’ll need to setup a few more things.
Point a url to your blog
Now amazon gives you an almost incomprehensible url, and if you were really cheap, you’d just get a free bitly url and use that as your address. If however you want to make things a bit more professional, then you’ll need to re-point you URL to the amazon address, and there’s 2 ways to do that. One is to make a re-direct on the url (host like namecheap and godaddy provide this). The other is to setup a CNAME DNS record, like this one I created on nearlyfreespeech.
You can check this by simply ping-ing cloud.keithrozario.com and see it resolve. Just fire up your command prompt and type ping cloud.keithrozario.com.
Now keep in mind, CNAME records take a while to take effect, so adding it now, may mean it gets resolved about 2-3 hours later, be patient, you’re almost there.
Take stock of where you are
Right now, you’ve created a blog, that anyone can access simply by either going to a url or your bitly url. You bitly url is even better as you can sprcify the /wordpress in the address itself.
However, if you’ve used a DNS entry, you’re a bit out of luck as to access your blog, people need to enter your url AND the ‘/wordpress’
The solution is a simple apache fix, however setting up the SSH and sFTP isn’t so simple, but in the interest of being thorough here we go.
Download Putty, PuttyGen and Pageant…and then WinSCP
These are remarkable programs that allow you to access your AWS machine. So head on over to here and download those 3 applications.
After that head on over here for your ftp application, I like WinSCP, you can download it here
Convert your .pem key to a .ppk key
Now remember that .pem key you downloaded from Amazon, we’re going to be using that. However, because putty is expecting a .ppk key, we’ll need to convert it to a format putty can understand, and that’s where PuttyGen comes in. Putty is a suite of applications, and PuttyGen is a key generator/converter tool to generate and (in this case) convert the key.
So armed with your .pem key:
1) Fire Up PuttyGen
2) Click on the Load Button
3) Browse to your .pem key, and then click open.
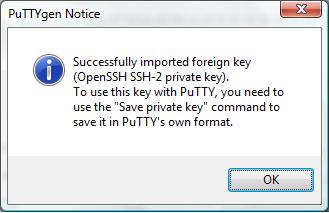
If everything went well you’ll see the following window:
Now click OK, then click “Save Private Key” and ignore the warning message about saving without a passphrase. Then PuttyGen will now give you a .ppk file that you can use to access your machine on the Amazon Cloud.
Access via SSH
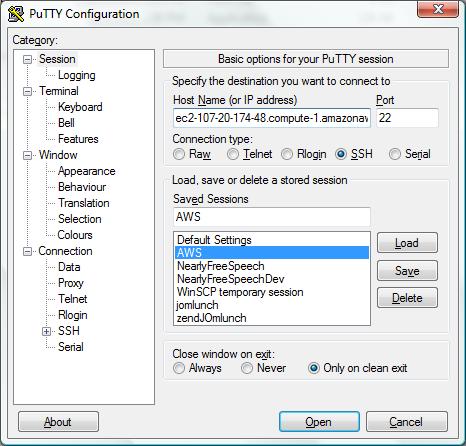 So now that everything is good to go, you’ve got a second bit of work you need to do. That is to access your machine. To do this, fire up your Putty instance.
Then fill up the hostname with your Amazon IP address, or Amazon Public DNS. In the picture on the left, I’ve filled it up with my Public DNS. Make sure you select a connection type of SSH.
Next head on down to Connection->SSH->Auth and in the private key field, browse to the .ppk file you’ve just created (not the .pem file)
Now before you proceed to the next step, fire up pageant, and you can see an icon on appear near your windows clock.
The hit the Open button and you should be able to access your machine via SSH.
For the image I chose, just enter ‘bitnami’ for the username and you’ll have access.
Amazing isn’t it? Now if you want to run as the root user instead of bitnami, just type sudo su to run the SSH window as the root user, and you have full access. That’s also an area that AWS is better than most hosting companies, in that you have full control on the version of machine, up the PHP version, MYSQL version, and even the file storage…AMAZING!!
Access via sFTP
Now open up your WinSCP (after you’ve installed it of course)
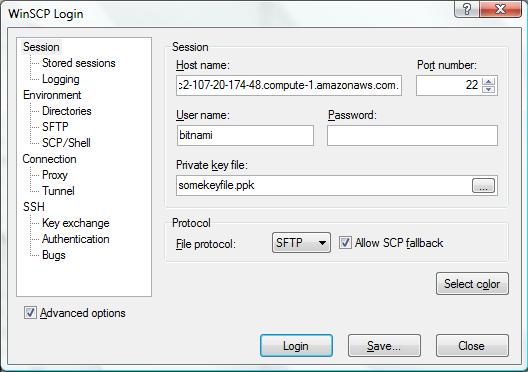 The create a new session. For the host name, enter your host name..i.e the Public DNS. Port number 22 (that’s for SSH) and enter ‘bitnami’ as the username.
Finally Browse to the .ppk key you created with PuttyGen (remember it’s not the .pem) and then check the ‘Allow SCP fallback’ box.
Then click login.
Now similarly to the SSH login, you’ll enter the sFTP access in the /home/bitnami folder. Now this folder is actually quite useless, so go up 2 levels to the ‘/root‘ directory for more ‘interesting’ stuff.
Now in the home directory you’ll see a whole bunch of interesting stuff. Remember this is your EC2 machine and you have a whole bunch of things installed, not just wordpress, but Apache2 and MYSQL and PHP and phpMyAdmin, all the regular stuff. These are all in the ‘/root/opt/bitnami’ folder. So if you want to modify your httpd.conf file it’s in the ‘root/opt/bitnami/apache2/conf’ folder.
Unfortunately, a lot of the files belong to the root user, and you login as bitnami. To change the permissions of the files, logon with SSH, use the SUDO SU command and then CHMOD the relevant files (these items are beyond the scope of this tutorial).
And there you have it
By now you’ve got a nice wordpress site, and FULL ACCESS to the EC2 machine. Meaning you can choose to run and install anything you wish on the machine. It is just amazing…however, what’s not so amazing is the prices.
Amazon does promise a year free, and so far it’s delivered on that promise. However, post this free trial you’ll have to pay something like 2.5 cents per hour, which works to roughly USD18.00 per 30 days. Now that’s pretty steep, considering most web host will gladly host your site for about 5 dollars/month, (and nearlyfreespeech does it for under 4 dollars/month)
However, there is one GLARING advantage. Amazons EC2 is way more sophisticated, scalable and powerful than anything any hosting company offers you. You get to choose what version PHP you want to run, what scripts you need to do, you can even get to choose the version of DB you’re running. You can even run public facing FTP directories, and a whole host of other stuff.
Amazon also has a higher security rating. So while some host may get attacked, Amazon probably is a lot more secure (after all it’s not just running blogs but entire enterprise infrastructure on the Amazon cloud).
So you could make a case for USD18/month, or you could not. What you can’t do is make a case for why you’re still sitting on your arse while Amazon is offering this service free for a whole damn year…now GET GOING and create your blog!!
[…] So I started blogging about setting up wordpress blogs or Joomla on nearlyfreespeech, dreamhost and amazon web services. If you didn’t know how much I loved wordpress, let me tell you now…I Love it a Lot […]
Great stuff…thanks , this really helped me on my blog 🙂
I’m glad it did KevinG, what’s your blog address by the way?
[…] before that you need to setup an AWS account, I recently blogged about how you can setup a wordpress site on the Amazon EC2 instance, now it’s time to look at the S3 data storage. Now the good news is that the free-tier […]
GR8 Many thanks.